- Subscribe to RSS Feed
- Mark Topic as New
- Mark Topic as Read
- Float this Topic for Current User
- Bookmark
- Subscribe
- Mute
- Printer Friendly Page
Share
- Mark as New
- Bookmark
- Subscribe
- Mute
- Subscribe to RSS Feed
- Highlight
- Report Inappropriate Content

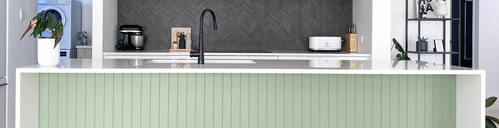
This is a custom build office desk. I have used two Kaboodle base cabinets for one side and a small shelving unit for another.
This is a challenging corner of the room with a slightly obtuse angle (about 105-110 degrees). Therefore a smart idea was required to make the right hand side of the office desk look nice.
We have opted in to use the curved shape of the desktop.
For the cabinets we used two Kaboodle cabinets: the 450mm and 400mm. The Kitchen cabinets are not compatible with the office cabinets due to their height, and therefore we used a very low kicker (only 25mm high). This way the height of the desk was the standard 760mm.
This whole desk was built from materials entirely bought from Bunnings
Materials
Tools
Drawer Cabinet:
- Kaboodle 450mm 4 Drawer Base Cabinet $231.85
- Kaboodle 450mm Antique White Modern 4 Drawer Panels - $83.59
- Prestige 96mm Brushed Nickel Half Round And Square Handle - 4x - $30.32
Door Cabinet:
- Kaboodle 400mm White Base Cabinet - $118.11
- Kaboodle 400mm Antique White Modern Cabinet Door - $67.99
- Prestige 224mm Brushed Nickel Half Round And Square Handle - $16.42
Desktop:
- 2200 x 600 x 28mm Tasmanian Oak Feature Grade Panel - $269
- Desk Hole Cover Waterproof Detachable Insulative Office Table Cable Grommet, 50mm Silver - $5.40
Side Panels / Shelves:
- Electric drill
- Electric driver
- Circular saw
- Router
- Wall Stud finder
- Level
- Caulking gun
- Gap filler
- Epoxy Resin
- Polyurethane Varnish
Steps
Step 1
1/6Assemble Kaboodle cabinets
Then join them together and add a small kicker.
I have used 25mm white laminated MDF offcut left behind from my other project

Step 2
2/6For the extra smoothness I have use epoxy resin to fill any imperfections in the Tassy Oak panels
Then I have cut off one side of the panel to create the curve
I have also made two side panels and another supporting panels with shelves.
I have finished the edges with the round router bit.
I have coated the panels with three coats of Polyurethane Varnish.

Step 3
3/6Assemble the desk. Make sure to use the stud finder to find the studs in the wall and secure everything to the studs. The Cabinets are secured with long screws. For the desktop I have used Pocket Holes to secure it to the wall as well.
Fill the gaps with the gap filler


Step 4
4/6Hand cabinet doors, attach cabinet handles

Step 5
5/6Make holes for the cable grommet


Step 6
6/6Complete

- Mark as New
- Bookmark
- Subscribe
- Mute
- Subscribe to RSS Feed
- Highlight
- Report Inappropriate Content
Re: Custom office desk: Kaboodle Kitchen hack
Hey @chaau,
That's a brilliant desk; I've got to say I am quite envious.
It looks perfect for the space and has created a wonderful spot to study, read or watch videos on your laptop.
The timber looks great with the white cabinets and the little custom shelves near the wall are a brilliant spot to place chargers and small items.
Thank you for sharing such a fantastic project with our community.
Jacob
Why join the Bunnings Workshop community?
Workshop is a friendly place to learn, get ideas and find inspiration for your home improvement projects
| Subject | Author | Posted | |
|---|---|---|---|
| September | |||
| September 2023 | |||
| 2 weeks ago | |||
| 3 weeks ago | |||
| October |