- Subscribe to RSS Feed
- Mark Topic as New
- Mark Topic as Read
- Float this Topic for Current User
- Bookmark
- Subscribe
- Mute
- Printer Friendly Page
Share
- Mark as New
- Bookmark
- Subscribe
- Mute
- Subscribe to RSS Feed
- Highlight
- Report Inappropriate Content
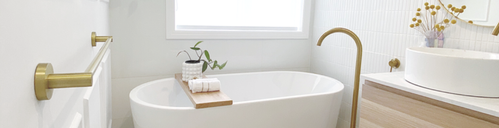
 Two Art/wet wall panels, hand shower, mixers
Our ugly-but-interesting 4m2 bathroom (1940s 'bank home' 1 🛀 3 🛏️ ') needed a half-at-a-time back-to-studs renovation on a budget. (4.5k?) This is just Stage 1: est. shower over existing bath to allow leaking shower removal (every surface and the subfloor will be replaced - watch this space). Had to do my research to figure out how to use these wet walls... seems they are stocked and sold but not used by anyone in the trade... I did ask a LOT of qns of a lot of people. Pending: WallArt review and Stage 1 cost ($550?) Excl. plaster and electricals totalled later.
Materials
Tools
2x WallArt 3mm wet area panels (Snow White) 1x internal corner joining strip,
1x sheet-joining strip and
2x end cap (for all edges).
Scrap of panel joiner strip and 1x external corner strip panels to cover base of bath.
Hand shower, 2x flick mix, bath spout etc. Single hinged over-bath shower screen.
structural treated pine
roll of wall insulation and sarking
Crommelin waterproofing primer (for cement sheet later) and shower membrane 4ltr and small project roller and tray, PPE, shop vac.
Dulux 1Step Prep primer sealer undercoat Int/ext.
Ryobi hybrid work light (all electricals were out between ceiling plaster and 2nd demolition stage )
Ryobi drill driver
Ryobi multitool and recipro saw
Demo: wonderbar, hammer, chisel, pliers etc. saws and straight edges.
hacksaw and mitre box.
Steps
Step 1
1/7Use hands and wonderbar and tall friend to demolish plastic and pine lined walls(!!), remove 5 🐀 carcasses, live with dust and drafts but the smell is improving

Step 2
2/7
check and repair bath (framework, hardwood floor missing sections for plumbing), curse lathe and plaster (dust will scratch any modern surface, blanket your stuff and vac don't wipe up!).
insulate walls (adjacent to an uninsulated area) and insulate under bath for good measure.
Step 3
3/7Prep treated pine sections as noggins/studs to affix plumbing and to allow a 1600x800 hinged bath screen fixture later. Get sparky to disconnect and check (switch board is behind our shower wall... I freaked but it's ok but can be relocated later) plumber rough in.

Step 4
4/7Add aqua check (incl. batten and plaster over existing lathe and plaster ceiling - $$ to Tradies). Live with it half done and prime the ceiling while waiting for courage to cut my 2x $215 panels, and saving up money for the floor, (finding a second hand vanity and reconditioning it - project to follow)

Step 5
5/7Most controversial step: (heaps of tradespeople, the WA manufacturers, plasterers etc were unsure if WAWAP and the required Sika would stick to WP membrane - the green goo assumes a tile cement on top. So... can't afford tile. Mask off WA. Use waterproof membrane (paint and tape), live with it.

green and smelly while drying...
Step 6
6/7Measure walls and panels to last mm, double check (joining strips filled with silicone add approx 6mm width per individual join). use grinder to cut panels, be outdoors it stinks. Use all the PPE, WAWAP is so hard you can file it or sand down any burrs. (Refer instructions re top/ cutting side, the Snow White is double sided but ensure chip-out is all on the back or can be filed to fit and smooth). Use carbide tipped hole saw to make plumbing holes, install with plenty of Sika Flex kitchen bathroom sanitary silicone adhesive on back. Hacksaw strips to size, 11mm short on verticals. Install. Breathe and bathe.

Step 7
7/7Results: we are up n running with a wet area, so rolled onto demo Stage 2. a shower-ova is not for all who own elbows, and the WA panels needed to be battened out, loosing a bit of space. Main Pro: could be 'fast Install' and is not cheap but DIY so 'cheaper'. Main Con. Not for the faint of heart behind the grinder or handsaw (!) and panels hang to but don't touch bath lip so water looks as tho it would be getting in the seam (there are bath-cap strips but not advised by Mfctr for shower-ova) but that's how the last plastic panels were installed and the plumber was confinement - only one place had sign of water behind when I demo'd the old plastic walls.
- Mark as New
- Bookmark
- Subscribe
- Mute
- Subscribe to RSS Feed
- Highlight
- Report Inappropriate Content
Re: shower over bath conversion with WallArt wet area panels (WAWAP)
Main detail I omitted is that for installation there are 3mm silicone gaps all around so I ensured I had plenty of packers - scraps of wet wall are best (hence the hacksaw)
- Mark as New
- Bookmark
- Subscribe
- Mute
- Subscribe to RSS Feed
- Highlight
- Report Inappropriate Content
Re: Shower over bath conversion with WallArt wet area panels
Hi @LeftNostril,
Thank you for sharing stage 1 of your bathroom renovation and welcome to the Bunnings Workshop community, it is fantastic to have you join us.
The Wall Art wet area panels are a great way to finish off wet areas on a budget and they look great in your revamped bathroom.
Congratulations on completing stage 1 of your bathroom renovations, I can't wait to see the rest.
Jacob
Why join the Bunnings Workshop community?
Workshop is a friendly place to learn, get ideas and find inspiration for your home improvement projects