- Subscribe to RSS Feed
- Mark Topic as New
- Mark Topic as Read
- Float this Topic for Current User
- Bookmark
- Subscribe
- Mute
- Printer Friendly Page
Share
- Mark as New
- Bookmark
- Subscribe
- Mute
- Subscribe to RSS Feed
- Highlight
- Report Inappropriate Content

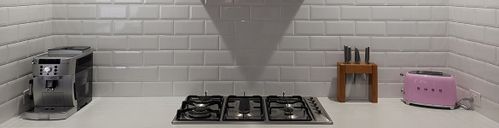
I researched so many options for a splashback to cover the holes after I removed some shelves and a knife block. It was going to be time consuming and costly.
Simple solution was to fill the holes and paint the tiles!
Steps
Step 1
1/6Wash the tiles using sugar soap.
Step 2
2/6Sand using a sander and wipe clean.
Step 3
3/6Fill the holes with the putty, following the instructions on the pack.
Step 4
4/6Once dry, sand to a smooth finish.
Step 5
5/6Paint the undercoat, then two coats of top coat, leaving until completely dry between coats.


- Mark as New
- Bookmark
- Subscribe
- Mute
- Subscribe to RSS Feed
- Highlight
- Report Inappropriate Content
Re: Kitchen splashback refresh with paint
Hi @raceytrace
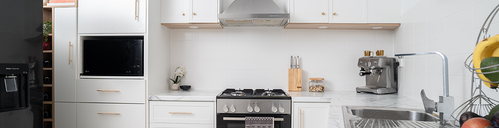
Your splashback painting upgrade really shines and brings your kitchen together. What an amazing transformation, your kitchen totally looks different, and you did it all with just paint.
Thank you so much for sharing your kitchen repainting project.
Eric
Why join the Bunnings Workshop community?
Workshop is a friendly place to learn, get ideas and find inspiration for your home improvement projects