- Bunnings Workshop
- >
- Discussion
- >
- Whole of House
- >
- Kids play table build
Kids play table build
- Subscribe to RSS Feed
- Mark Topic as New
- Mark Topic as Read
- Float this Topic for Current User
- Bookmark
- Subscribe
- Mute
- Printer Friendly Page
- Mark as New
- Bookmark
- Subscribe
- Mute
- Subscribe to RSS Feed
- Highlight
- Report Inappropriate Content
Kids play table build
We've been looking for a play table for the ankle biters for a little while and had found some relatively small / cheap ones around online that we weren't too fond of, but after some research, found some plans using a certain Swedish brand shelving so create a play table.
This is where my DIY quest begins.
Not one to shy away from a woodwork challenge, it occurred to me that for roughly the same cost (and some extra tools as a bonus*) I could knock up something using some decent plywood and a bit of elbow grease. And still have some ply left over to build a matching shelf unit.
All in all, I'm pretty rapt with the result, though my edge banding job was fairly dodgy, but the kids love it, which is really all that matters.
And if I ever think of doing something of this magnitude again, I'm using it as an excuse for a table saw. While the circ saw and a straight edge worked really well, aligning the thing perfectly for repetitive cuts got old very quickly.
* new tools include a Kreg pocket hole jig, and a new orbital sander.
And now, the pictures...
All the plywood cut to size
First coats of wipe-on poly
Initial assembly - loving pocket hole joinery!
Clear coat finished, starting on the table top
Dodgy edge banding
Dry fitting the bezel
Done and (ready to be chalk) dusted!
- Labels:
-
Building and Construction
-
Furniture
- Mark as New
- Bookmark
- Subscribe
- Mute
- Subscribe to RSS Feed
- Highlight
- Report Inappropriate Content
Re: Kids Play Table Build
Great project @Mick0s. Many thanks for sharing. I love that you've incorporated the storage tubs. You can never get enough storage with kids around.
I'm sure this will inspire other community members. Nice work.
Jason
- Mark as New
- Bookmark
- Subscribe
- Mute
- Subscribe to RSS Feed
- Highlight
- Report Inappropriate Content
Re: Kids Play Table Build
Well done.
- Mark as New
- Bookmark
- Subscribe
- Mute
- Subscribe to RSS Feed
- Highlight
- Report Inappropriate Content
Re: Kids Play Table Build
Super project @Mick0s, no wonder the ankle biters are happy, you've made them an amazing, sturdy & functional piece that will last, & so will the memories.
If you become a Grandparent, I can see you having to knock up a few more so that they won't fight over this one. ![]()
By the way, you're unnecessarily harsh on yourself by saying that your edge banding is dodgy. I'm with the kids, I thinks it's perfect.
I also love that you used C chanel aluminium extrusion as tracks for the slide out bins, I've used them for other purposes, but I'll definitely take on what you've done in future projects.
Big thumbs up from me. ![]()
- Mark as New
- Bookmark
- Subscribe
- Mute
- Subscribe to RSS Feed
- Highlight
- Report Inappropriate Content
Re: Kids Play Table Build
Great idea to put a chalkboard paint top on it. Well done @Mick0s.
- Mark as New
- Bookmark
- Subscribe
- Mute
- Subscribe to RSS Feed
- Highlight
- Report Inappropriate Content
Re: Kids Play Table Build
Handy and helpful
Instagram @projectpete.diy @at.home.rosehill @kayudesignco @aspirebamboo
- Mark as New
- Bookmark
- Subscribe
- Mute
- Subscribe to RSS Feed
- Highlight
- Report Inappropriate Content
Re: Kids Play Table Build
Absolutely loving the pocket holes.
Makes builds so much quicker!
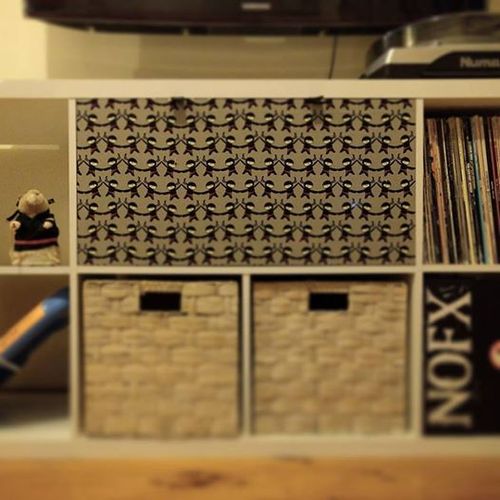
I pulled together a quick pine face frame (now covered in fabric to hide away the xbox and TiVo) in only about an hour or so the other night, and its dead flat, and the butt-joins are aligned almost flawlessly!
So the next pocket hole project is probably a long overdue dart board cabinet, but I think I need to bang together an actual workbench for the garage first. Sawhorses and offcuts for the table top are a bit annoying.. ![]()
- Mark as New
- Bookmark
- Subscribe
- Mute
- Subscribe to RSS Feed
- Highlight
- Report Inappropriate Content
Re: Kids Play Table Build
- Mark as New
- Bookmark
- Subscribe
- Mute
- Subscribe to RSS Feed
- Highlight
- Report Inappropriate Content
Re: Kids Play Table Build
Haha, nope. Life seems to have (once again) kicked that one to the kerb.
Any free space I had in the garage is now gone thanks to a new (to me, anyway) camper trailer, and I've been busy on getting a chicken run together before the three chicks that currently inhabit my bathroom are too big to be kept inside any longer!
I've got progress photos, so there wil be a chicken house build thread in the coming weeks. ![]()
- Mark as New
- Bookmark
- Subscribe
- Mute
- Subscribe to RSS Feed
- Highlight
- Report Inappropriate Content
Re: Kids Play Table Build
Good luck with the build @Mick0s.
@darylhewston has set the bar pretty high in the Workshop community with his automatic chicken coop door opener!
Jason
Why join the Bunnings Workshop community?
Workshop is a friendly place to learn, get ideas and find inspiration for your home improvement projects
You might also like
We would love to help with your project.
Join the Bunnings Workshop community today to ask questions and get advice.


