- Subscribe to RSS Feed
- Mark Topic as New
- Mark Topic as Read
- Float this Topic for Current User
- Bookmark
- Subscribe
- Mute
- Printer Friendly Page
Share
- Mark as New
- Bookmark
- Subscribe
- Mute
- Subscribe to RSS Feed
- Highlight
- Report Inappropriate Content

Materials
Tools
British Paints 4 in 1 Prep Water Based Primer Sealer Undercoat
Taubmans Mohawk Blue paint
White satin paint
Tube of brown acrylic paint
Timber stain
Taskmaster 34mm Matte Black Cabinet Knob
Sanding Pads
Sugar soap
Painters tape
Timber trim
Wood glue
Glitz Beeswax polish
Ryobi One+ Multi Tool (sanding attachment)
Ryobi One+ Drill
Handsaw
Paint brush, roller and tray
Steps
Step 1
1/3Step 1. Unscrew all the hutch doors removing the top ones permanently. Remove hinges from bottom doors and set aside.
Step 2. Sand all sufaces to remove the varnish - no need to sand back to bare timber. Clean all surfaces with sugar soap and allow to dry.
Step 3. Cut to size a length of timber trim to cover the indentations left behind from the upper doors on the top half of the hutch. ( this may not be necessory if no damage is showing) Glue in place and leave overnight.
Step 4. Apply two coats of primer on all surfaces except for the main bench top. The hutch is in two pieces so no painters tape was used on the top half at this stage, only to the underside of the main bench top on the lower section.
Step 5. Add a tiny amount of brown acyrlic paint to the white satin paint and mix to give desired shade ( I found the untinted white a bit too stark for this project) Paint the inside of the upper section of hutch and the inside of the lower section.
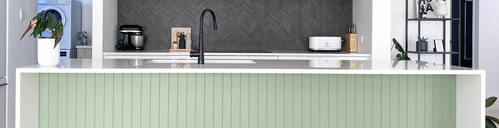
Step 6. Once dry, attach the painters tape to the upper section and paint the remaining section with 2 coats of Mohawk Blue paint. (use photo as guide ) Paint the doors blue as well.
Step 7. Apply stain to the main bench top. ( I couldnt get the exact colour I wanted so smeared on some brown acrylic paint with a dampcloth.) Rub on some beeswax polish to the surface.
Step 8. Remove painters tape and reattach the hinges to the doors. Attach the doors to the lower cabinet and then attach the handles.
Step 2
2/3
Step 3
3/3
- Mark as New
- Bookmark
- Subscribe
- Mute
- Subscribe to RSS Feed
- Highlight
- Report Inappropriate Content
Re: Dining hutch
Hello @KellieN
Welcome to the Bunnings Workshop community. It's sensational to have you join us, and thanks for sharing your beautifully upcycled dining hutch.
Thank you very much for sharing the steps you took to revamp this dining hutch. It's always a pleasure to see a timber appliance given a second life. I love the colour choice you've chosen as it feels so coastal. The dark colour for the benchtop provides the perfect contrast for the entire set. How many days did the revamp take? Did you run into any challenging spots?
Again, thank you for sharing such a wonderful project.
Eric
- Mark as New
- Bookmark
- Subscribe
- Mute
- Subscribe to RSS Feed
- Highlight
- Report Inappropriate Content
Re: Dining hutch
Hi Eric, the project took me quite a few weekends to complete as I was upcycling some chest of drawers at the same time. The main challenge I had was how to cover up the indentations left behind from removing the doors from the top section. I bought a length of bullnose timber trim which covered it perfectly and finished it off nicely. The other problem I had was with staining the timber bench top. I tried multiple stains but none were covering up the honey coloured timber. Some dark brown acrylic paint did the trick. Thankyou for welcoming me.
KellieN
- Mark as New
- Bookmark
- Subscribe
- Mute
- Subscribe to RSS Feed
- Highlight
- Report Inappropriate Content
Re: Dining hutch
Hello @KellieN
Thanks for sharing that extra information regarding your upcycling project. I'm sure our members will find it useful.
Eric
Why join the Bunnings Workshop community?
Workshop is a friendly place to learn, get ideas and find inspiration for your home improvement projects